Last Updated on December 8, 2023 by Erin
Wouldn’t you love a life hack that can keep your busy mom life organized? I’m sharing how to use Google Keep to get everything under control.
Prior to COVID and virtual learning, I really only utilized the basics of Google to stay organized. Our school district is a “Google” district, and I was pretty comfortable with the basics of Gmail, Google Drive, and Google calendar. Virtual and hybrid school forced those of use working in education (and parents at home) to get really familiar with technology really quickly. I am now a Google Meet “master” and I’ve added Google Slides and Google Keep to my toolbelt. They became staples at work and now they are helping me stay organized at home.
I’m pretty sure “mom brain” never goes away…and maybe even gets worse as we age. I need all the help I can get!
What is Google Keep?
Google Keep considered itself a “note-taking” app and can be used and synced up on both computers and phones (Android devices included). There are five types of notes you can make in Google Keep:
- Checklists
- Drawings and sketches
- Audio recordings
- Photo images
- Basic text
I primarily use it for checklists but maybe the other varieties suit your needs better!
The 7 ways you can utilize Google Keep:
1. Keep all of your lists in one place
This is the beautiful thing about Google Keep. No longer do I need a grocery list on the fridge, and a planner in my purse, and a brain dump notebook in my nightstand. It’s all in one convenient location that I can access from multiple devices (more on that later).
You can easily type a title but to make your notes even clearer, you can add images with large text. I made my headers in Canva using a 16×6 in design and I love them! It gives an “aesthetic” feel, which I know is all the rage right now. Here is a screenshot of my Google Keep headers:
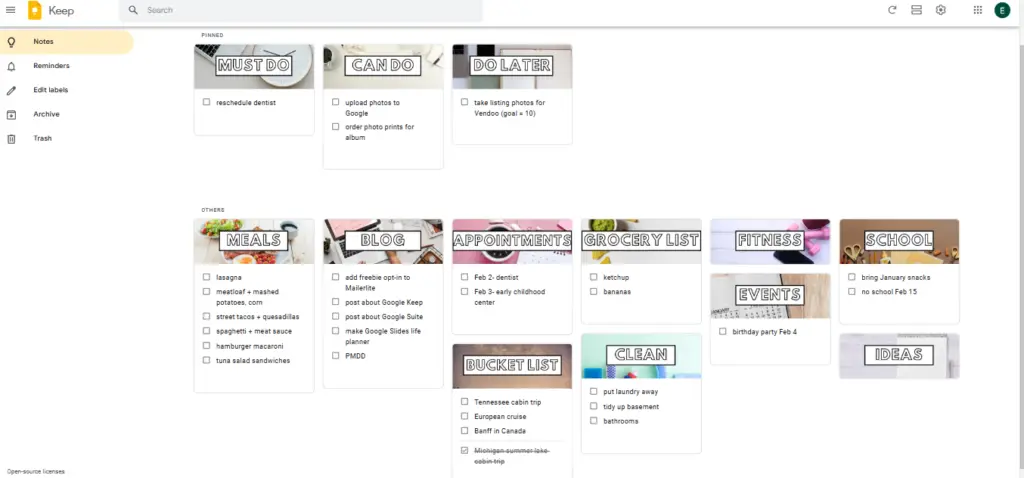
As you can see, I’ve set up all of my notes to be checklists and I have used the next tip…
You can easily create 16×6 in header images in Canva if that’s something you’re comfortable with. If you’d like to just have the ones I’ve made and give them a try, you can sign up below and I’ll email them to you!
2. Pin your priority notes to the top
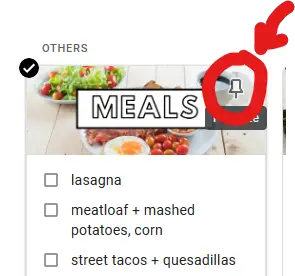
I pinned my “to do” lists to the top with varying levels of urgency. These are the things my midlife brain easily forgets. Click on the pushpin icon in your header to stick it to the top of the page.
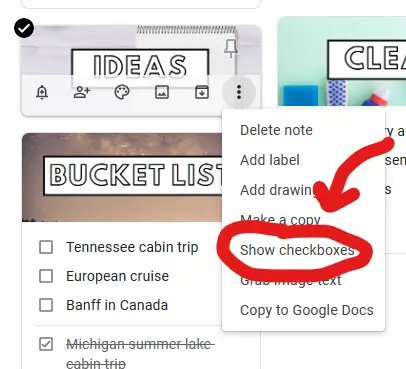
3. Use checkboxes so you get the satisfaction of crossing things off the list
Not only do the checkboxes help separate the text on your lists, but you get to click the boxes so that your items get crossed off. They show up as “completed” at the bottom of your list. As you can see, we got to cross our Michigan trip off the bucket list last summer 🙂
Don’t worry, those checked off items will stay there until you manually delete them. I know I’ve had to go back and check things I already did.
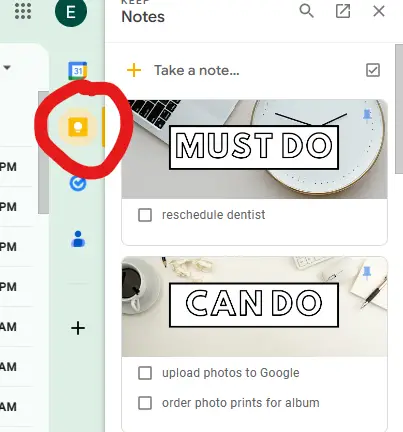
4. Open Google Keep as a sidebar in your Gmail or Google Calendar
This is so convenient! You don’t have to flip between tabs in your browser. You can see upcoming appointments in your lists while you’re adding them to your calendar. You can add to your lists when you get the email notifying you of an event.
5. Download Google Keep on your phone and Apple Watch
It won’t be super helpful to have lists trapped on your desktop. Make sure you have access to it everywhere! As far as I know, Android phones allow you to download Google Keep as well.
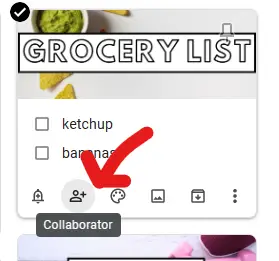
6. Add collaborators
Invite your family members to be “collaborators.” You can invite them to specific notes, so they don’t see everything. (That gives me an idea for the kids’ birthday wish lists!)
This way, regardless of who runs to the store, your grocery is always available to whoever needs it, and you don’t bear the sole burden for updating lists or getting the shopping done.
7. Set reminders to your notes
If you click the little bell in the bottom left corner of your note/list, you have the option to set a reminder. You get to pick the day, time, and location. It will then add the reminder to your Google calendar and you will get a notification at the designated time. I LOVE that everything is synced up in the different Google apps. It really makes life easier! Even if I write things down, it’s easy for me to get distracted. Notifications are a lifesaver and I really need to see them in multiple places for it to stick.
There you have it– seven ways to use Google Keep and stay organized! It’s been a gamechanger in our home and I love that I don’t need tons of paper lists and notebooks all over the place. My scatterbrain is incredibly grateful for this technology.
If you give a try, I’d love to know what you think! Don’t forget to share or save this post if you found it helpful (or if you want to try it out later).
Don’t forget you can sign up to have the pre-made Google Keep header images emailed to you!
Sincerely,
Erin
P.S. Looking for more life hacks? Make sure you read my post about simple life hacks for busy moms. I promise you’ll find something that will make your life easier.